Ievads
The GAMDIAS Aura GC10m V2 WH is a micro-tower computer case designed for Micro-ATX and Mini-ITX motherboards. It features a dual-chamber design, panoramic tempered glass panels, and comes equipped with three Addressable RGB (ARGB) fans to enhance system aesthetics and cooling. This manual provides essential information for the proper installation, operation, and maintenance of your computer case.
Attēls: priekšpuse view of the GAMDIAS Aura GC10m V2 WH Micro-Tower Computer Case, showcasing its tempered glass panels and pre-installed ARGB fans.
Uzstādīšana un uzstādīšana
Pirms instalēšanas sākšanas pārliecinieties, vai jums ir visas nepieciešamās sastāvdaļas un instrumenti. Konkrētus instalēšanas norādījumus skatiet mātesplates un sastāvdaļu rokasgrāmatās.
1. Lietas sagatavošana
Carefully remove the tempered glass side and front panels. These are typically secured with thumbscrews or a latch mechanism. Place them on a soft, flat surface to prevent scratches.

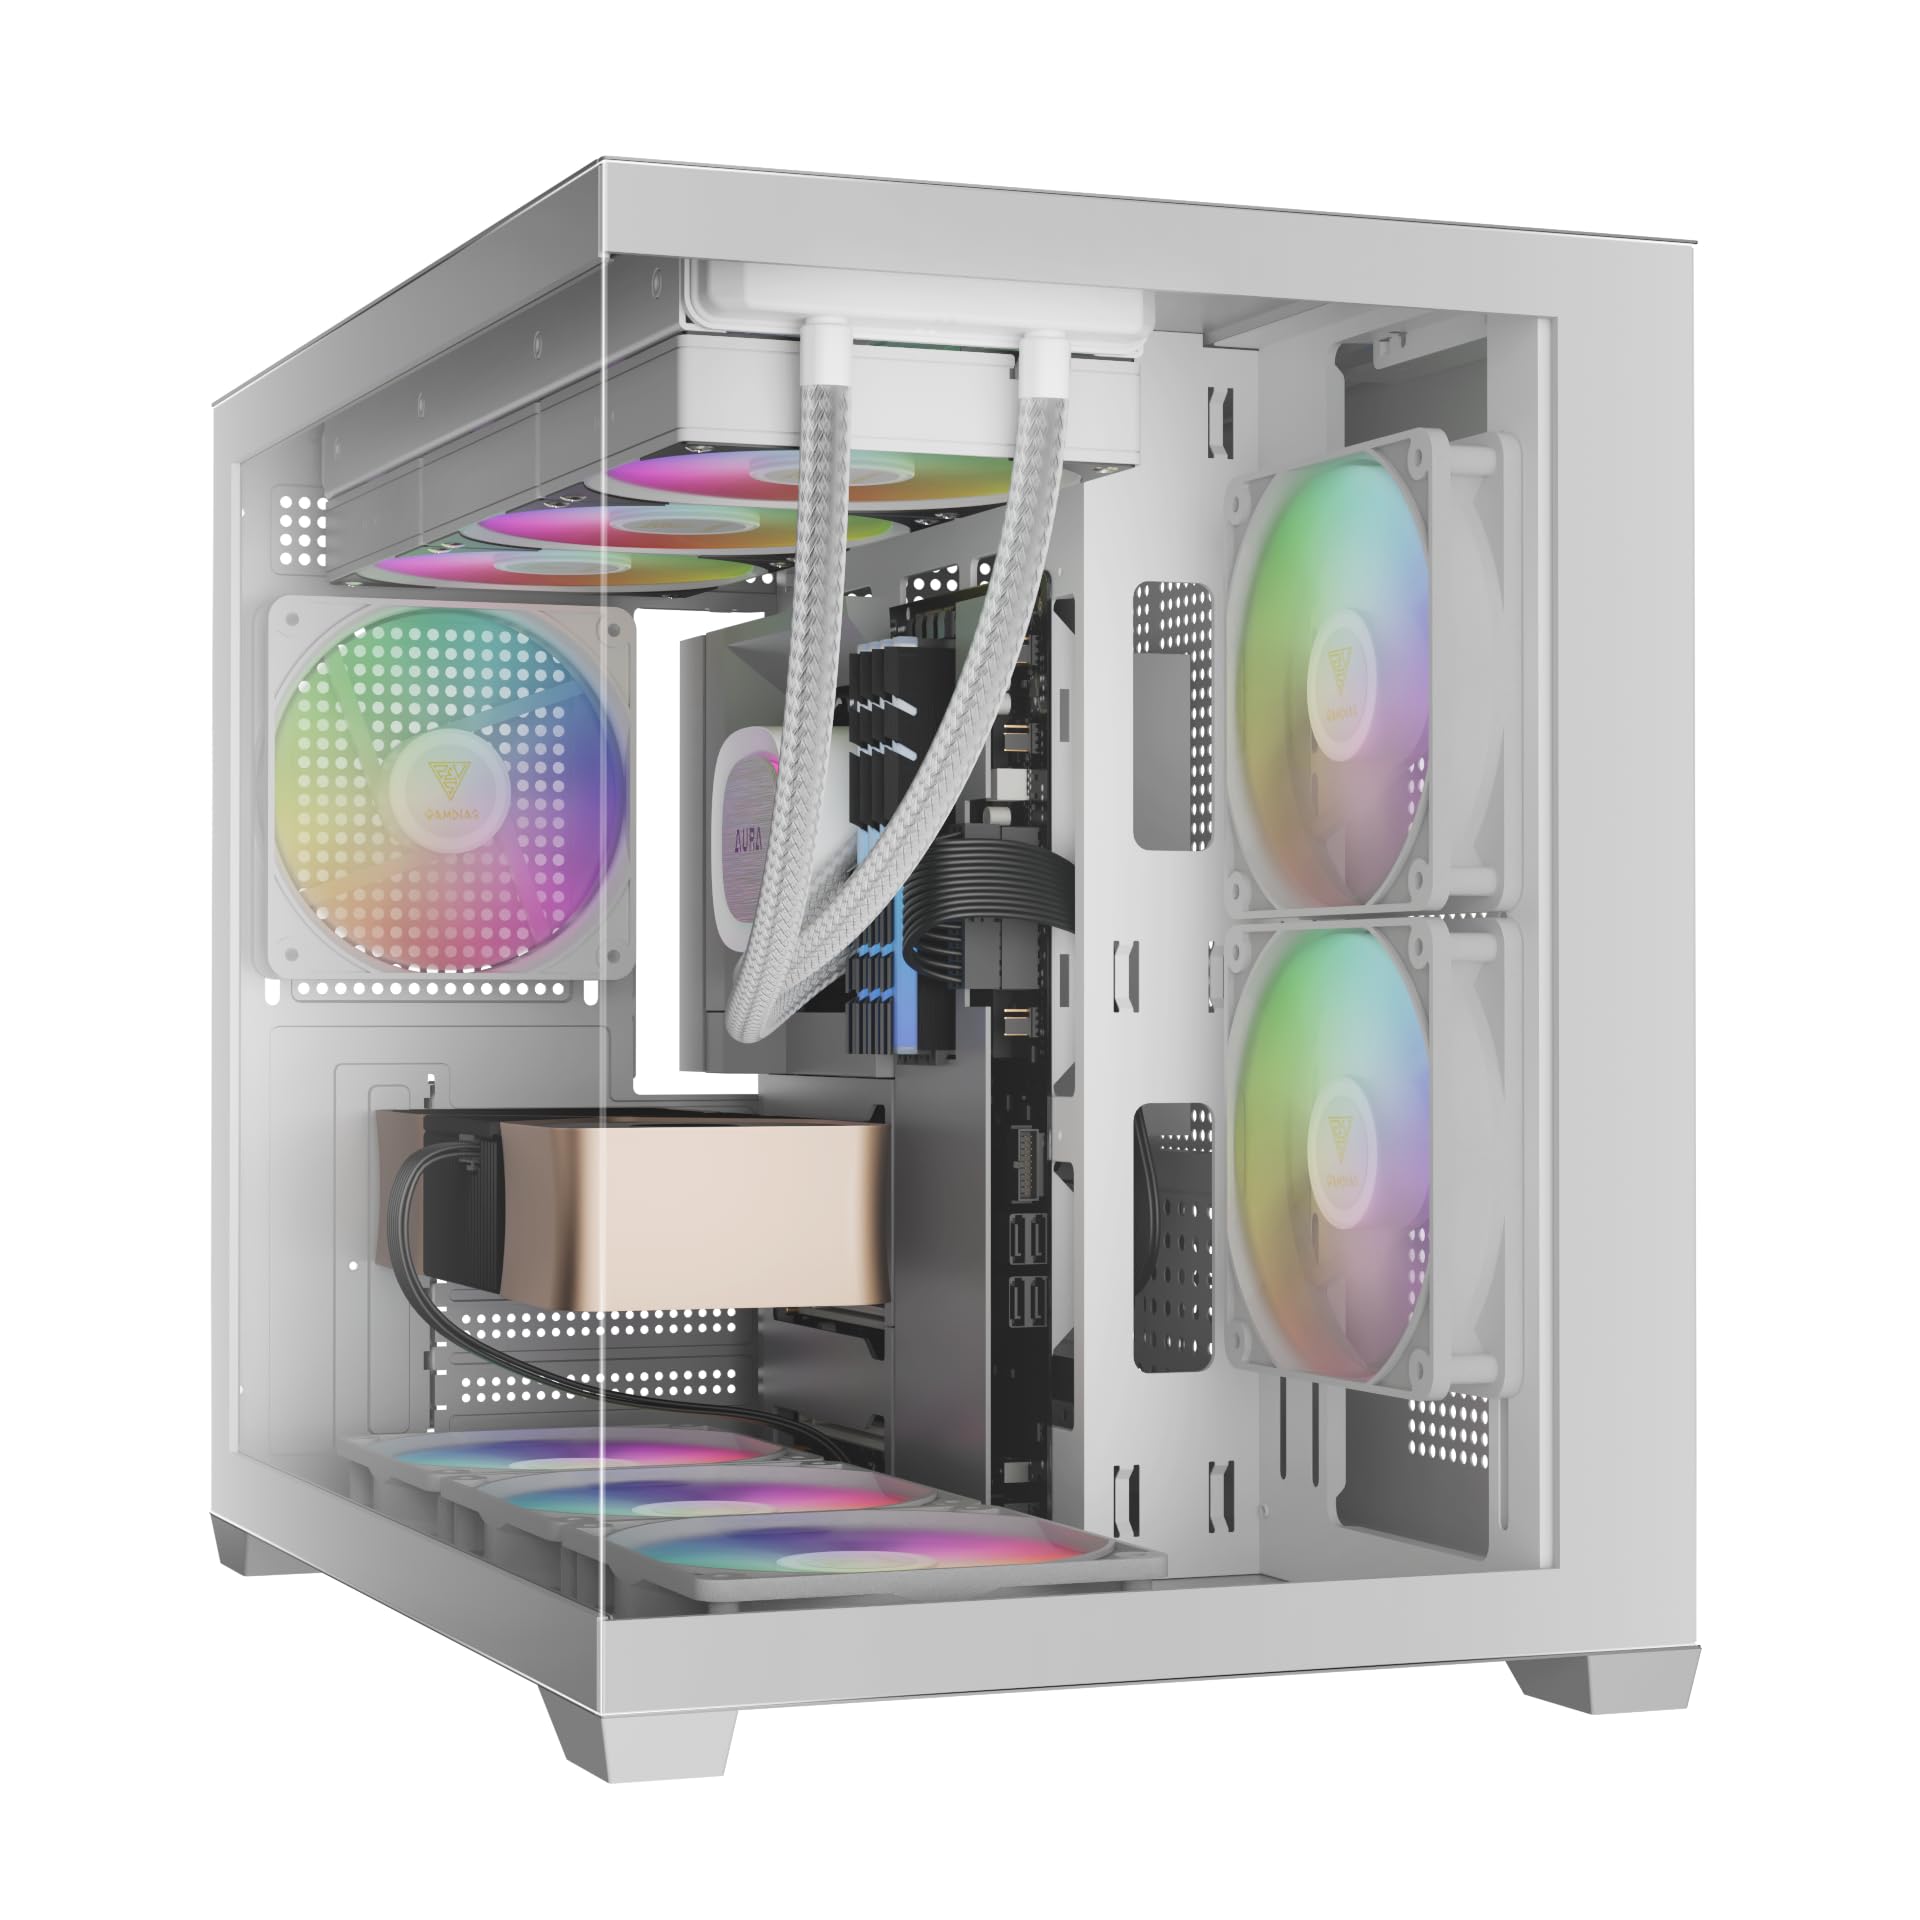
Attēls: Leņķis view of the case with the tempered glass side panel removed, showing the internal structure and fan mounts.
2. Mātesplates uzstādīšana
- Uzstādiet I/O aizsargu (ja tas nav iepriekš piestiprināts pie mātesplates) korpusa aizmugurējā atverē.
- Novietojiet savu Micro-ATX vai Mini-ITX mātesplati ar korpusa iekšpusē esošajiem starplikām.
- Nostipriniet mātesplati, izmantojot komplektā iekļautās skrūves.

Attēls: Iekšējais view of the case, highlighting the motherboard tray area and fan mounting points.
3. Barošanas bloka (PSU) uzstādīšana
- Install your PSU into its designated compartment, typically at the rear bottom of the case.
- Piestipriniet barošanas bloku ar skrūvēm no korpusa aizmugures.
- Ensure the PSU fan faces the correct direction for optimal airflow (usually downwards if there's a vent, or upwards if not).

Image: Rear internal view of the case, showing the PSU mounting area and cable routing options.
4. Diska uzstādīšana
- 3.5" / 2.5" Drive Bay (HDD Cage): Locate the HDD cage. Install one 3.5" HDD or one 2.5" SSD/HDD.
- 2.5" Drive Bays: The case supports three additional 2.5" SSDs/HDDs. Mount these drives to the designated brackets or locations within the case.
5. Ventilatora un radiatora uzstādīšana
The case comes with three pre-installed ARGB fans (two side, one rear). Additional fans or radiators can be installed in the following locations:
- Augšā: Supports 3 x 120mm or 2 x 140mm fans; 360mm or 280mm radiators.
- Sānu: Supports 2 x 120mm or 2 x 140mm fans; 240mm radiators. (Pre-installed 2 x 120mm ARGB fans)
- Apakšā: Atbalsta 3 x 120 mm vai 2 x 140 mm ventilatorus.
- Aizmugure: Supports 1 x 120mm or 1 x 140mm fan; 120mm radiators. (Pre-installed 1 x 120mm ARGB fan)

Attēls: Iekšējais view showing the pre-installed ARGB fans on the side and rear, illustrating fan placement.
6. Connecting Front I/O Ports and ARGB
Connect the following cables from the case to your motherboard:
- USB 2.0: Connect the USB 2.0 header cable.
- C tips: Connect the USB Type-C header cable (if your motherboard supports it).
- HD audio: Connect the HD Audio header cable.
- Barošana/Atiestatīšana/LED indikatori: Connect the front panel power, reset, HDD LED, and power LED cables according to your motherboard manual.
- ARGB Fans: Connect the ARGB fan cables to your motherboard's 5V ARGB header or to the integrated ARGB controller (if applicable). The case includes an LED Switch Button for controlling ARGB lighting if connected to the case's internal controller.

Attēls: Augšpusē view of the case, showing the front I/O panel with USB ports and the LED switch button.
Darbība
Ieslēgšana
Once all components are installed and connected, close the side panels. Connect your monitor, keyboard, mouse, and power cable. Press the power button on the front panel of the case to start your system.
ARGB apgaismojuma vadība
Iepriekš instalētos ARGB ventilatorus var vadīt divos veidos:
- LED slēdža poga: If the ARGB fans are connected to the case's internal controller, press the dedicated LED Switch Button on the front I/O panel to cycle through various lighting effects and colors.
- Mātesplates programmatūra: If the ARGB fans are connected directly to a compatible 5V ARGB header on your motherboard, you can control the lighting effects using your motherboard's proprietary RGB software (e.g., ASUS Aura Sync, MSI Mystic Light, Gigabyte RGB Fusion, ASRock Polychrome Sync).
Apkope
Regulāra apkope palīdz nodrošināt datora komponentu optimālu veiktspēju un ilgmūžību.
- Putekļu filtri: The case features removable dust filters (e.g., on the top and bottom). Periodically remove and clean these filters with compressed air or water (ensure they are completely dry before reinstallation).
- Korpusa tīrīšana: Izmantojiet mīkstu, damp cloth to clean the exterior surfaces of the case. For tempered glass panels, use a glass cleaner and a microfiber cloth. Avoid abrasive cleaners.
- Iekšējā putekļu noņemšana: Every few months, open the case and use compressed air to remove dust from internal components, especially fan blades and heatsinks.
Problēmu novēršana
Ja rodas problēmas, apsveriet šādus bieži sastopamus risinājumus:
- Sistēma neieslēdzas:
- Pārliecinieties, vai barošanas bloks ir ieslēgts un pareizi pievienots sienas kontaktligzdai.
- Pārliecinieties, vai visi strāvas kabeļi (24 kontaktu ATX, CPU, GPU, diskdziņi) ir droši pievienoti.
- Check that the front panel power button cable is correctly connected to the motherboard.
- ARGB ventilatori neieslēdzas/negriežas:
- Confirm ARGB cables are securely connected to a 5V ARGB header on the motherboard or the case's controller.
- Ensure fan power cables are connected to appropriate fan headers on the motherboard or PSU.
- If using motherboard software, verify it is installed and configured correctly.
- Priekšējās I/O pieslēgvietas nedarbojas:
- Check that the USB and HD Audio cables from the front panel are correctly connected to their respective headers on the motherboard.
For persistent issues, consult your motherboard manual or contact GAMDIAS support.
Specifikācijas
| Modelis | AURA GC10 V2 WH |
| Lietas veids | Mikrotornis |
| Mātesplates atbalsts | Micro-ATX, Mini-ITX |
| Izmēri (LxWxH) | 42 x 29 x 37 cm |
| Svars | 5 kg |
| Drive Bays | 1 x 3.5" or 1 x 2.5" (HDD Cage), 3 x 2.5" |
| I/O porti | 1 x Type-C, 1 x USB 2.0, 1 x HD Audio, 1 x LED Switch Button |
| Iepriekš instalēti ventilatori | 2 x 120mm ARGB (Side), 1 x 120mm ARGB (Rear) |
| Fanu atbalsts |
|
| Radiatoru atbalsts |
|
| CPU dzesētāja augstuma ierobežojums | 165 mm |
| VGA garuma ierobežojums | 400 mm |
| Barošanas bloka garuma ierobežojums | 160 mm |
Garantijas informācija
For detailed warranty terms and conditions, please refer to the official GAMDIAS webvietni vai garantijas karti, kas iekļauta jūsu produkta komplektācijā. Saglabājiet pirkuma apliecinājumu garantijas prasību iesniegšanai.
Klientu atbalsts
If you require further assistance or have questions regarding your GAMDIAS Aura GC10m V2 WH computer case, please contact GAMDIAS customer support.
- Ražotājs: GAMDIAS TAIWAN
- Adrese: No. 113, Jian 2nd Rd., Zhonghe, Dist., New Taipei City 235, Taiwan
- Importētājs (Indija): Allway Distributions Pvt Ltd, No-49, H.B. Samajha Road, Baswangudi , Bengaluru- 560004
- Importer Contact (India): 8904307700
- Oficiālā Webvietne: www.gamdias.com (Lūdzu, pārbaudiet oficiālo website for the most up-to-date support contact information and resources.)


